A field guide to the CrazyGames build
Starting a store
The browser build opens on a menu with three doors, and the one we took starts a shop from scratch. This page is the order the client puts them in and what it asks before it lets you in.
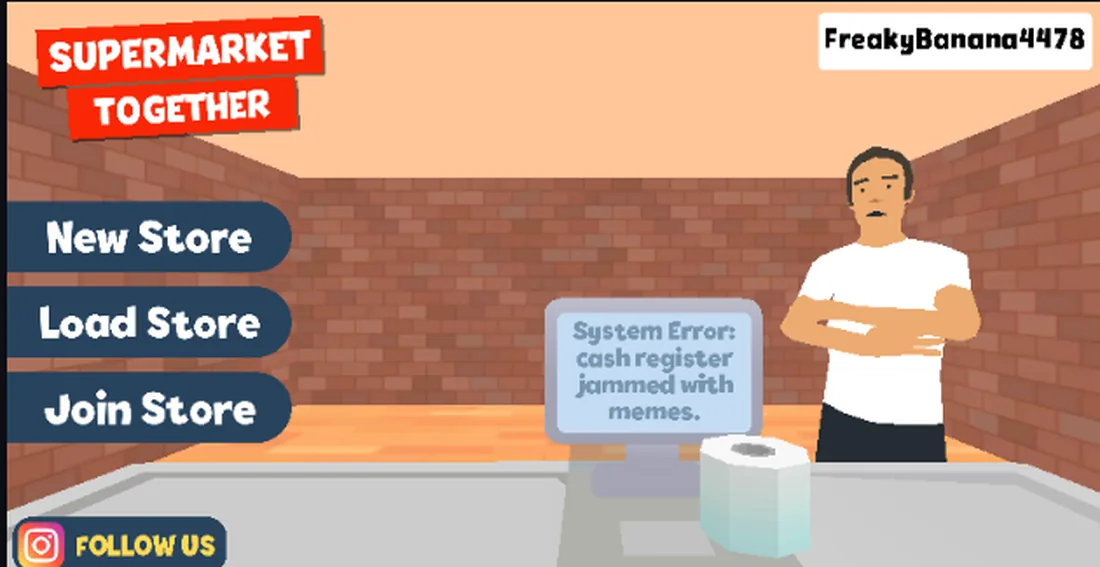
The menu has three doors
The first screen after the game loads is not a tutorial. It is a menu with three wide buttons stacked on the left, a username chip across the top right, a save icon beside it and a wardrobe icon under that:
| Button | What it does |
|---|---|
| New Store | starts a shop from scratch — the path that showed the configuration dialog in our session |
| Load Store | opens a store this browser has saved already — untested |
| Join Store | enters someone else's store — we did not open this one, so the co-op flow below is what the dialog prints, not a tested join |
A joke alert floats in the middle of the screen at the same time. Across four menu loads we caught four different ones: "Alert: customer launched into orbit by trolley physics.", "Warning: store layout now officially cursed.", "Reminder: checkouts don't accept hugs as payment." and "System Error: cash register jammed with memes." They are not errors and they do not change anything, but four loads is not enough to call the set complete.
What New Store asks before it opens
Choosing New Store opens a panel headed VISIBILITY with two decisions in it:
- Private or Public. In the capture the panel opened with Public already highlighted, carrying the line "Public store. All players are welcome to join." Private is the other option beside it.
- PLAYER PERMISSIONS: Visitor, Assistant or Manager, again with Assistant highlighted on opening. The build's own explanation for the middle setting reads "Normal permissions. Joining players can help you in the store but can't buy, sell, or change prices."
The panel closes with SAVE & CONTINUE and also carries a small X in the corner, so we cannot say from one pass whether a store can be created without answering it. Nothing in the panel mentions a fee, a slot count or a level requirement.
The store code is the invitation
Once the panel is accepted, the game starts loading and hands you an identity for the shop before you see the floor:
| Field | What we saw |
|---|---|
| Store name | My Supermarket |
| STORE CODE | 4966B in our session, with a COPY button |
| STORE LINK | a URL with its own COPY button |
| Permissions | the setting chosen in the dialog above |
The code and the link are the invitation the build prints. Whether a second player can actually join with them is not something this session tested.
What you see when the loading finishes
The first in-game frame is outside the building, looking at the shop from the pavement. The sign above the door carries the store name, an OPEN sign hangs beside the entrance, and the heads-up display already shows:
- a gear and a chat icon at top left, with Tab and C printed under them
- a backpack icon and a Q hint on the left edge
- LVL 1, a money counter reading 10.00, and a SHIFT panel at top right
What this page does not answer
We have not yet completed a shift, so we cannot say what the first day asks of you, whether the tutorial objectives continue after the checkout step, or what the SHIFT panel counts. Those are marked on the pages that need them rather than guessed here.
If you are looking for the Steam game with the same name, this is not it — see the two games first.
Last checked against the client: 2026-11-06 · client web build 2026-11-06